Paperless recorders, also known as digital data recorders, are sophisticated electronic devices designed to capture, store, and display data in a digital format. They have essentially replaced the need for paper charts and manual data logging in many industrial and commercial settings. These recorders are commonly used in industries such as manufacturing, pharmaceuticals, food and beverage, environmental monitoring, and more. In this blog, we will provide a step-by-step guide on how to effectively use a paperless recorder in your applications.
Installation
Instrument operating environment will not only affect the normal use of the instrument, but also affect the maintenance and calibration work. Instrumentation environment should meet the following requirements:
Operating temperature: (0~50) ℃
Relative humidity: (10~85) % RH (No condensation)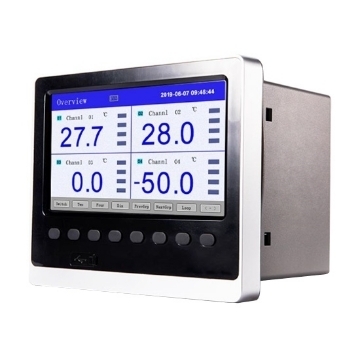
Ventilation requirements: ventilated to prevent the internal meter temperature is too high
Vibration disturbance: Less mechanical vibration
Airingredients: NOT easy to produce condensate, non-corrosive gas or flammable gas
Inductive interference: no strong inductive interference, not easy to produce static electricity, magnetic fields or noise
Meter position: When installing the instrument, try to maintain the level and do not tilt left and right
Wiring
ln order to improve the stability and accuracy of the signals, it is recommended that you use the cold terminal signal cable to wire.
Step 1: Powering On the Device
To begin using a paperless recorder, make sure it's properly connected to a power source and turn it on. This is typically done by pressing a power button or flipping a switch. The device will go through its startup process, and you'll soon have access to its features.
Step 2: Setting Up the Recorder
After powering on, you'll need to set up the recorder with your specific requirements. Here's what you should do:
- Configure the Time and Date: It's essential to ensure that the recorder's internal clock is accurate. This step is crucial for data traceability. Some recorders can synchronize their time through network connections or GPS.
- Determine the Sampling Interval: The sampling interval defines how often the recorder captures data. You can select a sampling rate ranging from seconds to hours, depending on your application's needs. A shorter interval provides more detailed data but may require more storage space.
- Estimate Data Logging Duration: Before you start recording data, consider how long you need to capture information. Ensure that the recorder has enough storage capacity to accommodate your recording needs throughout this duration.
Step 3: Selecting Channels
Paperless recorders are often equipped with multiple channels, each connected to various sensors or input devices that monitor different parameters. Here's how to select the channels you want to use:
- Channel Configuration: Access the recorder's channel configuration menu to enable the specific channels you want to monitor. You may need to specify the sensor type and scaling for each channel to match your physical sensors (e.g., thermocouples, pressure transducers).
- Labeling Channels: Assign names or labels to the channels for easy identification. These labels should correspond to the physical location or parameter being monitored, making data analysis more intuitive.
Step 4: Configuring Alarms (Optional)
Configuring alarms is crucial for quickly identifying and responding to abnormal or critical conditions in your system. To set up alarms on your paperless recorder:
- Alarm Parameters: Define alarm setpoints for each channel. These setpoints specify the upper and lower limits at which the recorder will trigger an alarm. For example, in a temperature monitoring application, you might set a high-temperature alarm at 80°C and a low-temperature alarm at 20°C.
- Alarm Types: Choose the type of alarms you want to use, such as high-high, high, low, or low-low. Each type corresponds to different threshold levels and conditions for triggering alarms. For example, a "high-high" alarm might be used for critical conditions.
- Alarm Actions: Determine the actions the recorder should take when an alarm is triggered. Common actions include sounding an audible alarm, displaying a visual alarm on the screen, and sending notifications or alerts to relevant personnel via email or SMS.
Step 5: Start Data Logging
Initiate the data logging process by pressing the "Start" or "Record" button. The recorder will begin capturing data from the selected channels at the specified intervals.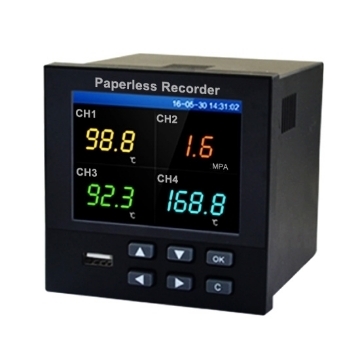
Step 6: Monitor Real-Time Data
The paperless recorder will display real-time data on its screen. You can view the current readings for each channel, allowing you to monitor the process or environment in real-time.
Step 7: Data Storage
The recorder will store the recorded data digitally in its memory or on external storage media (e.g., USB drive, SD card). Make sure there is enough storage capacity for your data logging duration.
Step 8: Data Retrieval
To access and retrieve the recorded data, navigate the device's menu to find options for data retrieval. You can usually search for specific time periods or channels. Some recorders also offer remote access options for data retrieval.
Step 9: Data Analysis
Once you've retrieved the data, you can analyze it using built-in tools or by transferring it to a computer for more in-depth analysis. Most paperless recorders provide graphing and data export capabilities.
Using a paperless recorder can greatly enhance data collection and management in your operations. By following these fundamental steps, you can harness the power of paperless recorders to monitor, record, and respond to real-time data with accuracy and efficiency. For more information on how to use paperless recorders, please refer to sisco.