The push-pull gauge is a mechanical measuring instrument used for push and pulls tests. The push-pull force gauge is suitable for push-pull load tests in industries such as electronic appliances, light industry textiles, construction hardware, lighters and ignition devices, fire-fighting equipment, pens, locks, fishing gear, power machinery, scientific research institutions, etc.
Push-pull gauges are not common tools; however, when properly used, they can provide a wealth of information about many common home improvement projects. These devices accurately measure the amount of compression or tension being applied between two objects. Without the use of this type of gauge, homeowners may only guess how much pressure is actually being applied, for example, by a heavy swinging gate on its mounting bracket, and whether the bracket's maximum load is being exceeded. So next sisco will talk about how to use a push-pull gauge.
How to use a push-pull gauge properly?
- Prepare the push-pull force gauge to take a measurement. Select the units of measurement, such as pounds, kilograms, or Newtons, by sliding the selector switch to the appropriate setting. The switch is usually located on the face of the tool. Remember that tension (a pulling force) will be displayed as a positive number. Compression (a pushing force) will be displayed as a negative number.
- Connect the sensor plug into the base of the gauge, then into the load sensor. The sensor plug is the long cable that transmits data from the load-sensing component to the handheld gauge. Screw both eye hooks onto the load sensor. The load sensor looks like a rectangular block of aluminum.
- Select either a "Fast" (0.2 seconds) or a "Slow" (0.6 seconds) rate of measurement setting. This setting determines how often the load sensor updates its findings to the gauge. Select the desired rate using the switch located on the face of the tool. Momentarily depress the "Zero" button on the face of the tool to zero the gauge between measurements.
- Align the load sensor with the object being measured. Correct alignment means that there will be no rotation of the object being measured or of the load sensor during the test. Rotating or moving objects or any swiveling by the load sensor will diminish the accuracy of your test. The correct angle of measurement is always 180 degrees -- a straight push or pull motion.
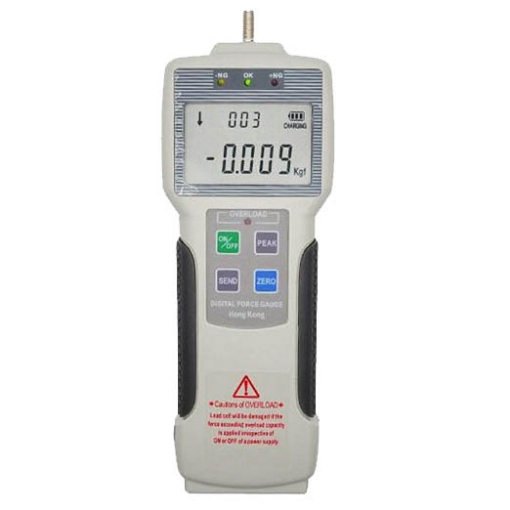
- Place the gauge in measurement mode by sliding the power switch to the "On" position. The switch is located on the lower edge of the gauge's hand grip. You may select between regular display mode and back-light display mode by reversing the LCD switch located beside the "On/Off" switch. Pressing that switch momentarily will illuminate (back-light) the LED display for 15 seconds, then shut off.
- Zero the gauge by momentarily depressing the "Zero" button on the face of the tool. Begin taking a measurement by applying a straight force (either push or pull) to the load sensor. Avoid jerky or unstable pressure during the test. Read the measured force on the LCD display. Release the load on the load sensor.
- Press the "Zero" button before taking a new measurement. Slide the power switch from the "On" position to the "Peak" position to measure the maximum amount of load placed on the load sensor during a test that contains variable load (push or pull) forces. The gauge will record and display just the maximum force attained.