Inside micrometers are invaluable tools for precision measurements in various industrial and manufacturing applications. They allow you to accurately measure the internal diameter of holes, bores, and other internal features. In this blog post, we'll guide you through the steps of using inside micrometers effectively and accurately.
Using an inside micrometer involves a series of steps to accurately measure the internal diameter or bore of a hole, cylinder, or other internal feature. Here's a guide on how to use an inside micrometer:
Tools Needed:
- Inside micrometer
- Properly calibrated gauge blocks (optional, for calibration)
- Calipers (optional, for rough measurement)
- Micrometer stand (optional, for stability)
Steps:
- Calibration (Optional): Before you start measuring, it's a good practice to ensure that your inside micrometer is properly calibrated. This is particularly important for accurate measurements. You can use calibrated gauge blocks to check and adjust the micrometer's accuracy. If your micrometer is already calibrated, you can skip this step.
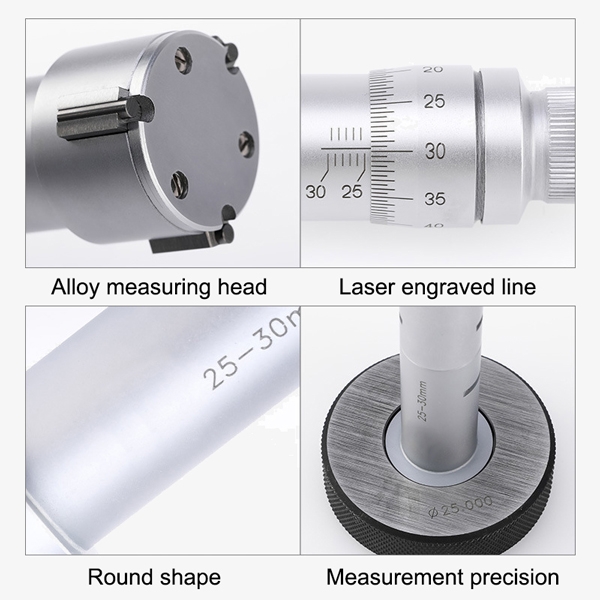
- Select the Right Size: Choose an inside micrometer head or set of measuring jaws that are appropriate for the bore diameter you want to measure. Ensure that the measuring jaws are clean and free from debris to avoid measurement errors.
- Rough Measurement (Optional): If you're uncertain about the bore's approximate size, you can use calipers or a rough measurement tool to estimate the diameter. This can help you select the right inside micrometer size and reduce the number of adjustments needed during the final measurement.
- Position the Inside Micrometer: Hold the inside micrometer head between your fingers and gently open the measuring jaws by rotating the thimble counterclockwise. Ensure that the jaws are aligned with the bore's axis and perpendicular to it.
- Insert the Measuring Jaws: Carefully insert the measuring jaws into the bore or internal feature. Ensure that they make contact with the bore's inner surface evenly and without tilting.
- Take the Measurement: Rotate the thimble clockwise to advance the measuring jaws until they make gentle contact with the bore's inner surface. Use the ratchet stop, if available, to apply a consistent and controlled pressure. Be careful not to over-tighten, as this can lead to inaccurate measurements.
- Read the Measurement: Look at the main scale and the vernier scale. The main scale provides a rough measurement, while the vernier scale offers precise readings. Note the alignment of the scales, and read the measurement. The vernier scale provides the measurement to a high degree of precision, typically in thousandths of an inch or tenths of a millimeter.
- Record the Measurement: Record the measured diameter, making sure to specify the units of measurement (inches or millimeters). If you're taking multiple measurements, ensure that the micrometer is properly zeroed each time.
- Remove the Inside Micrometer: Gently retract the measuring jaws from the bore, being careful not to damage the internal surface.
- Final Check: For critical measurements, you may want to repeat the process to confirm the accuracy of your measurement. Ensure that the bore is clean and free of burrs or debris that could affect the reading.
Precautions
When using an inside micrometer for measurement, it is necessary to connect the largest size extension rod to its micrometer head, and then connect it sequentially to the measuring contact, in order to minimize the bending of the connecting shaft after assembly.
During measurement, observe the variation in the fixed and loosened positions of the micrometer head.
In daily production, when measuring a hole with an inside micrometer, support the measuring contact on the surface to be measured, adjust the thimble so that one side of the measuring contact swings within the radial section of the hole to find the smallest size. Then tighten the fixing screw and take the reading. There is also a direct reading without tightening the screw. This leads to attitude measurement issues. Attitude measurement refers to the consistency between measurement and use. For example, when measuring with an inside micrometer with a range of 75 to 600/0.01mm, after connecting the extension rod, when the size is greater than 125 mm, there is a difference of 0.008 mm between readings when the fixing screw is tightened and when it is not, which constitutes an attitude measurement error.
The support position during inside micrometer measurement should be correct. The elongated large-sized inside micrometer undergoes gravitational deformation, involving form errors such as straightness, parallelism, and perpendicularity. The magnitude of its rigidity can be reflected in the "natural deflection." Theoretical and experimental results show that the stiffness determined by the workpiece's cross-sectional shape has a significant impact on the gravitational deformation after support. For inside micrometers with different cross-sectional shapes, although their lengths (L) are the same, when supported at (2/9)L, they all meet the requirements for the measured value error. However, if the support point is slightly different, the change in straightness is significant. Therefore, moving the support position to the location with the maximum support distance, known as the "natural deflection," is specified to ensure rigidity. The standard specifies that the support point of the inside micrometer should be at (2/9)L and at a distance of 200 mm from the end face, where the measurement variation is minimal. The inside micrometer should be checked every 90° of rotation, and the indicated error should not exceed the specified requirements.
Error Analysis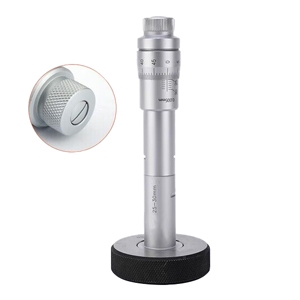
The direct measurement errors of an inside micrometer include deformation errors due to applied force, temperature errors, and the inherent indication errors associated with general measurements. These errors encompass reading alignment errors, contact errors, and zeroing errors of the measuring instrument. The main factors influencing the measurement errors of an inside micrometer are deformation errors due to applied force and temperature errors.
Usage and Maintenance
- Check if the zero reference line is accurate.
- Ensure that the surface of the workpiece to be measured is clean during measurement.
- For larger workpieces, place them on a V-block or flat surface for measurement.
- Clean the measuring rod and anvil seat before measurement.
- Use the ratchet device when tightening the adjusting sleeve.
- Avoid loosening the back cover, as it can alter the zero reference line.
- Do not apply regular machine oil between the fixed sleeve and the adjusting sleeve.
- After use, clean and lubricate the inside micrometer, store it in a dedicated case, and keep it in a dry place.
Using an inside micrometer requires a steady hand and attention to detail to ensure accurate measurements. Practice and experience will improve your proficiency with this precision measurement tool.