A soil sampler is a specialized tool designed to collect uniform, representative soil cores from the ground—enabling accurate analysis of soil properties like pH, nutrient levels (nitrogen, phosphorus, potassium), and texture. Its importance cannot be overstated for anyone working with soil, whether farmers, gardeners, or agronomists. Without a soil sampler, assessing soil conditions becomes guesswork. Random digging with shovels fails to capture consistent soil layers, leading to misleading results. A soil sampler, by contrast, extracts standardized cores from target depths, ensuring reliable data.
During the use of a soil sampler, correct operation and good practices can improve the accuracy of data. To obtain accurate results with a soil sampler, in this blog, sisco.com will introduce a step-by-step process. This process includes site selection, proper sampling techniques, sample handling, and testing—helping you obtain more accurate data.

Prepare the Sampling Area
The consistency of the sampling area directly determines the reliability of soil test results. Any deviation from representative soil conditions—such as localized nutrient accumulation or abnormal moisture levels—will lead to false data, which in turn misguides subsequent soil improvement measures. To avoid this, strict adherence to the following preparation rules is essential.
Selecting Representative Areas
Avoid "problem spots" that do not reflect the overall soil condition of the target area. Specifically, exclude regions within 3 feet of buildings and sidewalks, as these areas often have compacted soil or altered drainage due to construction. Similarly, skip areas with fertilizer bands, compost piles, or zones that have been recently limed or fertilized. These spots typically have abnormally high nutrient concentrations or adjusted pH levels, which are not representative of the broader soil environment and will skew test results.
Clearly Define Sampling Zones
Define sampling zones based on uniform soil and environmental conditions. For example, when sampling a lawn, do not treat the entire lawn as a single zone if it has distinct microclimates—such as a sun-exposed front yard and a shaded back yard. Different zones often differ in soil moisture, temperature, and organic matter content, which directly affect soil properties like nutrient availability and pH. By dividing the area into homogeneous zones and sampling each separately, you ensure that each sample accurately reflects the conditions of its specific zone.
Remove Surface Debris
Clear surface debris before starting sampling. Remove any grass clippings, mulch, rocks, or other surface materials, as these substances are not part of the root zone soil that directly interacts with plants. Including debris in the sample would introduce non-soil components, which can interfere with tests for nutrient levels, texture, and organic matter content—ultimately reducing the accuracy of the results.
Choose the Right Soil Sampler
Choosing a soil sampler depends on your specific work scenario, target soil properties, and sampling depth. Below is a scenario-based guide to match the right tool to your needs.
1. For Shallow, Small-Scale Sampling
Choose an auger soil sampler when you use it at home gardens, or small farms. It features a handheld spiral drill bit that’s easy to carry and operate manually—no power source is needed. Its spiral design efficiently lifts shallow soil (usually <1m) without mixing layers, making it perfect for quick tests like soil pH or nutrient checks in gardens or small agricultural plots.
2. For Collecting Undisturbed Soil
When you want to conduct soil structure or porosity analysis in a laboratory, you can choose piston soil sampler. It uses a piston to balance pressure during sampling, preserving the soil’s original structure (no compaction or particle damage). This is critical for lab studies—such as analyzing soil density, water retention, or layered composition—where intact samples are required to ensure accurate results.
3. For Medium-to-Deep, Large-Scale Sampling
When you need to do farmland surveys or construction pre-inspections, go with an electric soil sampler. Powered by a high-torque motor, it penetrates soil quickly (1–5m depth) and reduces manual labor. It works well for large areas (like crop fields or construction sites) where batch sampling is needed, and its consistent depth control ensures uniform data across the surveyed zone.
4. For General-Purpose, Layered Soil Sampling
If you have work of road construction or pollution screening, select a core soil sampler. Its sharp, hollow metal tube cuts cleanly through soil layers, and the smooth inner wall keeps samples intact. It’s versatile—suitable for checking soil layer thickness (for roads), preliminary pollution screening (e.g., industrial areas), or basic texture analysis—balancing efficiency and sample quality for everyday tasks.
5. For Heavy Metal Contamination Testing
Use heavy metals soil sampler in industrial sites and mining areas. It has an anti-contamination design (e.g., corrosion-resistant 316 stainless steel parts) that prevents metal leaching or cross-pollution. This ensures the collected samples accurately reflect heavy metal levels (like lead or cadmium) in polluted areas, which is essential for reliable contamination assessment.
Take Soil Samples
Take Soil Samples is the core of accuracy. The goal of soil sampling is to collect a uniform, representative core from the root zone of your plants—for most crops and lawns, this depth ranges from 6 to 8 inches, while for trees and shrubs, it is 8 to 12 inches. To insert the sampler, push or twist the auger or probe straight into the soil until it reaches the target depth, and be sure to avoid angling it, as this will result in collecting too much surface soil; when extracting the core, pull the sampler out slowly and tap it gently to release the soil core into a clean, dry bucket—opt for plastic or stainless steel containers, and never use galvanized metal, which can contaminate samples with zinc.
To ensure the sample is representative, repeat the process to take 8 to 10 cores from different parts of the same zone (such as 10 spots in the front yard sun zone), then mix these cores thoroughly in the bucket, as this step averages out small variations in the soil; finally, reduce the sample size by taking a 1–2 cup subsample (roughly the size of a baseball) from the mixed soil in the bucket and discarding the rest, since excessive soil is unnecessary for testing and can slow down the results.
Handle and Store Samples Properly
Contamination or excess moisture in soil samples can completely invalidate test results—even small amounts of foreign substances or uneven moisture levels can skew data on nutrient content, pH, and organic matter. To preserve sample integrity, strict adherence to the following steps is critical.
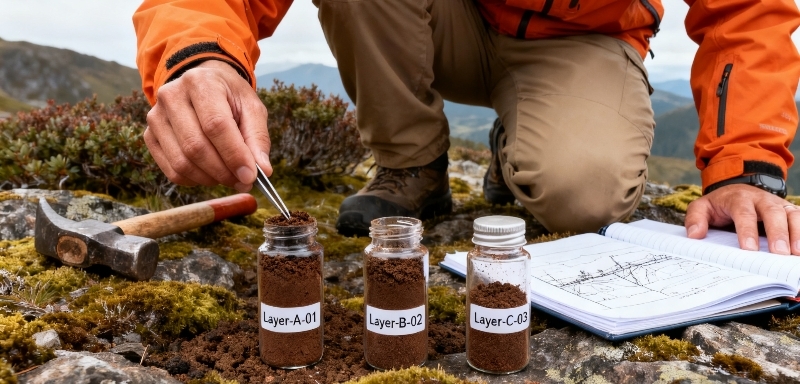
- Label the subsample container clearly and comprehensively. Use a paper bag or clean plastic container, and mark it with three key pieces of information: the exact date of sampling, the specific zone name, and the plant type associated with the zone. Avoid vague labels, as they can lead to confusion when interpreting results later.
- Dry the sample if it is wet. Moisture can cause nutrient breakdown, mold growth, or inaccurate weight-based measurements during testing. Spread the wet soil in a thin layer on a clean, dry surface (such as a fresh paper towel or a clean ceramic tray) and let it air-dry naturally for 1–2 days, turning it occasionally to ensure even drying. Never use an oven, microwave, or other heat sources to speed up drying: high temperatures destroy volatile nutrients like nitrogen, which are critical for understanding the soil’s fertility and making proper amendment decisions.
- Take strict measures to avoid contamination. Never touch the soil sample with your bare hands—skin oils contain chemicals that can alter pH levels or add unintended nutrients (like potassium or sodium) to the sample. Additionally, ensure all tools (such as the bucket used for mixing cores or the container for the subsample) are thoroughly cleaned and dried before use; residual soil from previous samples or dirt from storage can introduce foreign particles that skew test results.
Test Your Samples
To turn soil samples into actionable insights, selecting the right testing method matters—each option balances accuracy, convenience, and practicality differently, so aligning your choice with your needs ensures you get useful results.
Testing in Soil Lab
For the most accurate and comprehensive results, soil testing lab is a great choice—as they often offer affordable (or even subsidized) tests tailored to the regional soil types and common crops in your area. Labs use professional-grade equipment to analyze not just basic nutrients (nitrogen, phosphorus, potassium) but also secondary nutrients (calcium, magnesium) and micronutrients (iron, zinc), plus detailed pH and organic matter content. When working with a lab, always follow their specific instructions closely: some may require you to use their provided containers (to avoid cross-contamination) or fill out submission forms with details like sampling depth or zone. Labs can then tailor their recommendations to your unique needs (e.g., adjusting phosphorus levels or modifying pH), making the results far more actionable than generic data.
Testing in Home
Home test kits are ideal for quick, on-the-spot checks—they’re portable, affordable, and let you get a rough sense of soil conditions without waiting for lab turnaround. They work well for basic pH testing, but are less precise when it comes to measuring nutrient levels: most home kits only test for major nutrients (N-P-K) and use color-coded charts that can be subjective (e.g., distinguishing between "low" and “medium” nitrogen based on color shade is often tricky). To minimize errors, follow the kit’s steps exactly: use only the provided reagents (substituting other products can throw off results), measure soil and water in the ratios specified, and wait the full recommended time before reading results. Also, test the same sample 2–3 times to check for consistency—if results vary widely, it may be worth sending a sample to a lab for confirmation, especially if you’re planning major soil amendments like fertilizing or liming.
Conclusion
Soil sampling is a science-driven process that turns vague assumptions about soil health into actionable, accurate insights—and the soil sampler stands as its foundational tool. By eliminating the guesswork of random digging, it extracts uniform, representative soil cores, laying the groundwork for reliable analysis of pH, nutrients, and texture—critical for farmers, gardeners, and agronomists alike to make informed soil management decisions. The advice provided in this blog will help you obtain more accurate results using a soil sampler. Sisco online store provide many kinds of soil samplers for you. You are welcome to come and make a purchase.